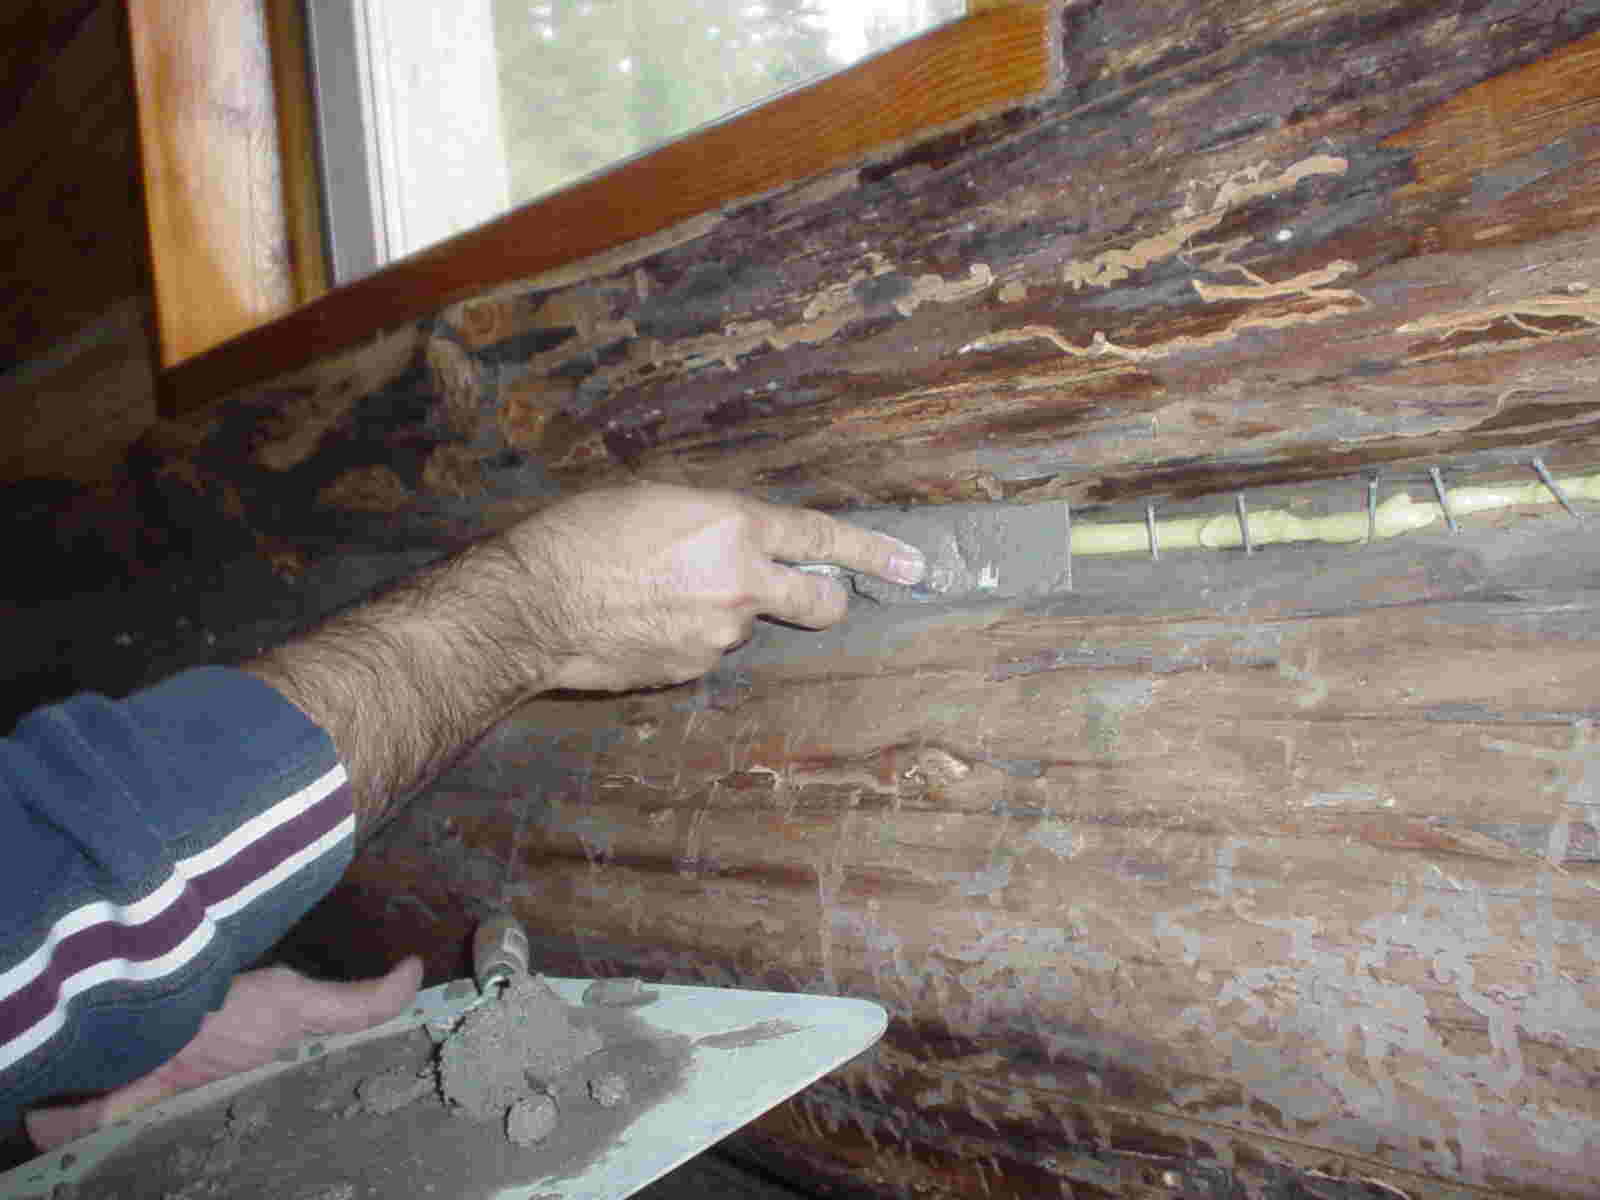
Using a simple flat cement tool, a mortar board and a tuck pointer, you can make the chinked seams in your cabin look great. Mix the mortar dry where it is supposed to hang in large amounts (like in the corners). Mix it wetter where you are smoothing a seam like this. You'll get better at it as you go along so do the parts that will get covered up first (Like behind the kitchen cabinets). The nails should be placed so you cannot touch them with the tool when applying the mortar.

Get the mortar smoothed in and then come back later when you are done with the row and smooth out any tool marks. The seams here are slightly crowned outward. You can use tools made with various type of black plastic pipe to create seams that are crowned inward. I didn't like these because the edges of such seams are harder to control and get right. When the seam has cured, you come back with a small bronze wire brush and clean up any cement that gets on the log. While the seam is still green, you can easily clean up many problem. Once it fully cures (and turns gray), it is much harder to modify but it is still possible. I found that with some care I could get the seams to be quite smooth. You have to be careful with the wire brush to not mess this up.
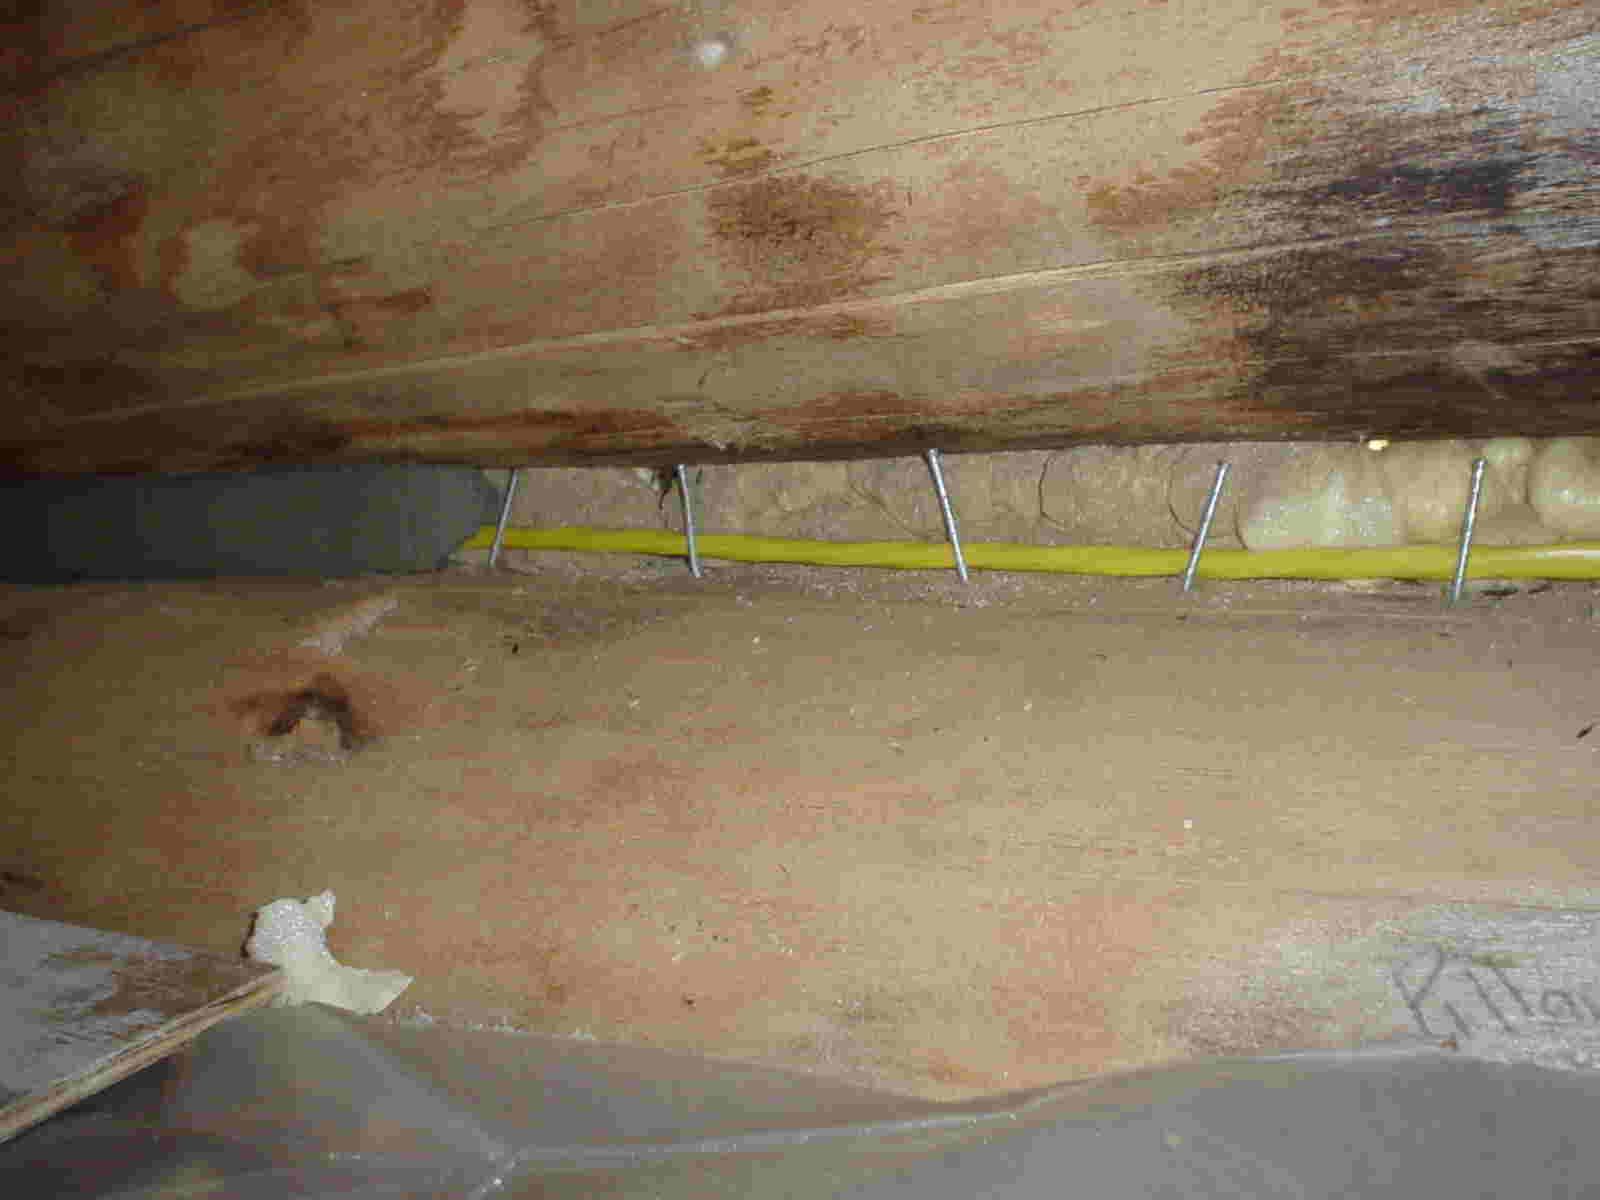
There has been some controversy about how to wire inside these seams. My State electrical inspector called me and told me that it would be OK, to do it this way, with the Romex inside the mortar. However, we'll have to see if it actually passes inspection
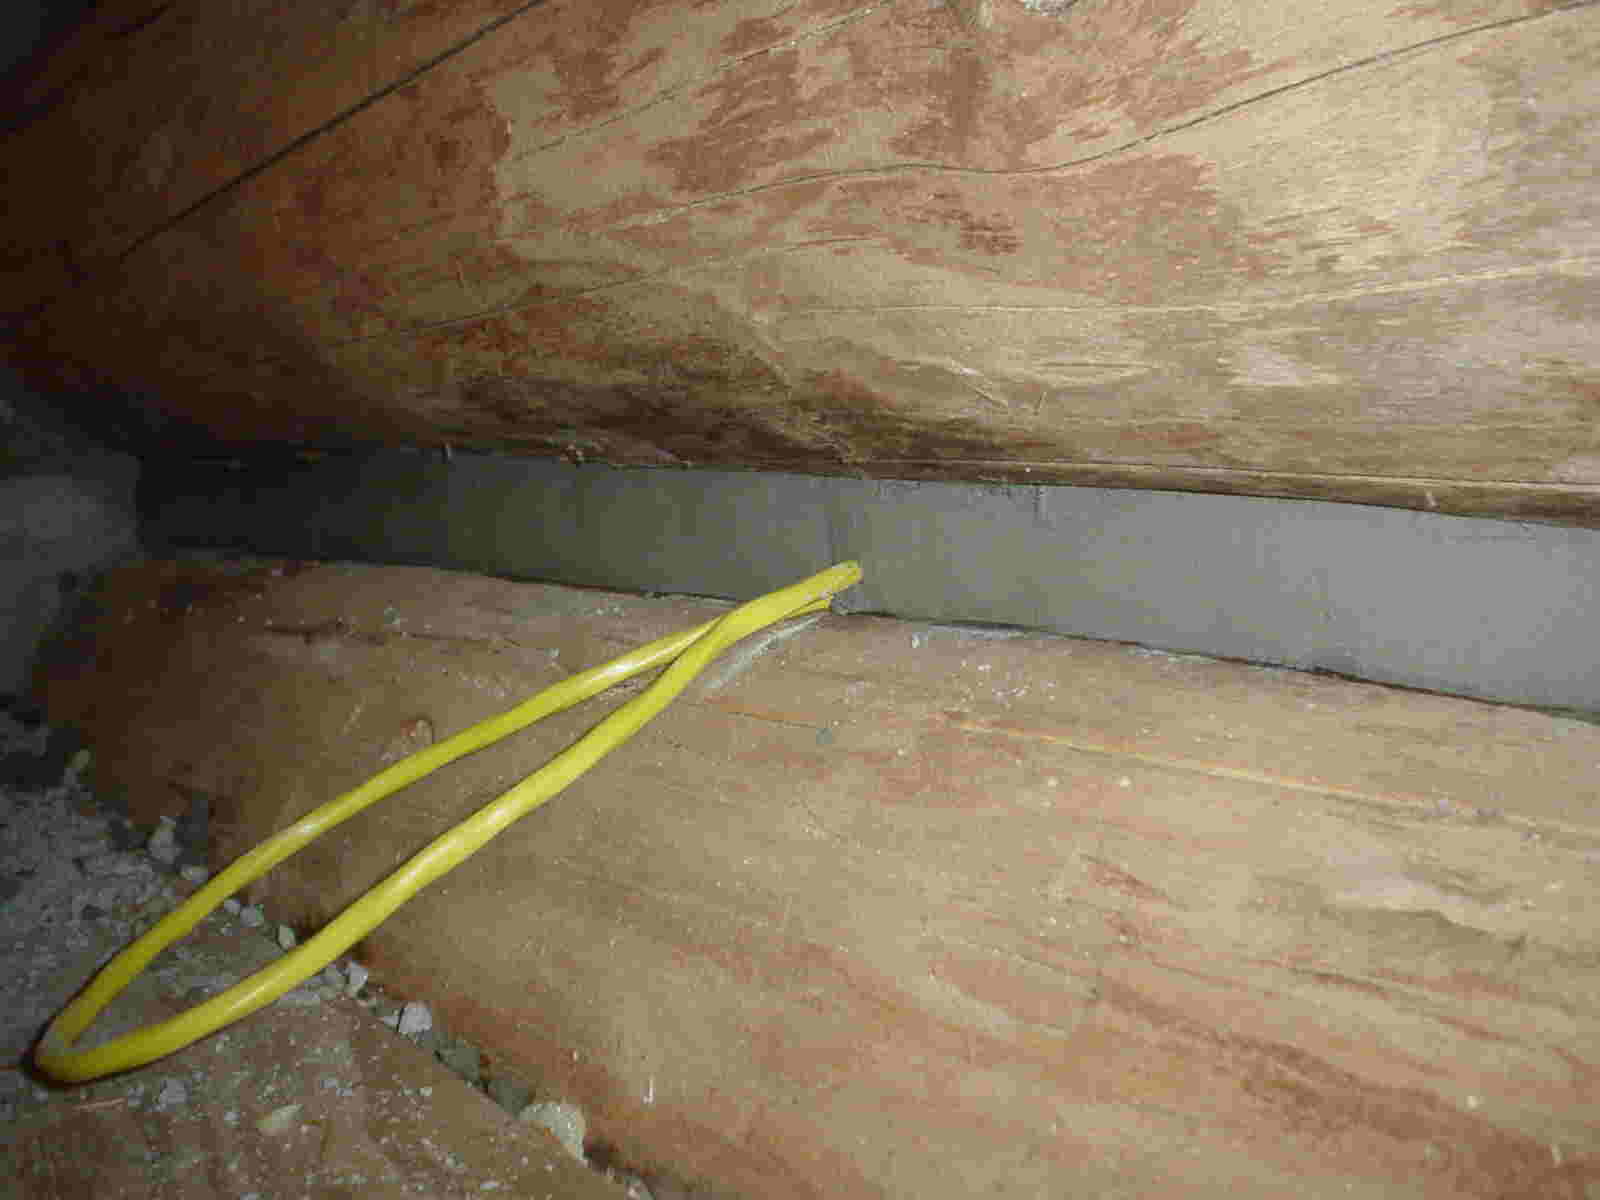
The wires come out through the mortar wherever you need to place an outlet and I use exterior boxes screwed into the logs above and below the seam to mount the fixtures. The boxes are small enough that they still don't stick out as far as the logs above and below them..

That means you can move furniture up against the wall and not hit the outlet. If you don't like running the wires inside the chinking, you can use the rigid conduit between these boxes, running in the groove created by the chinked seam.
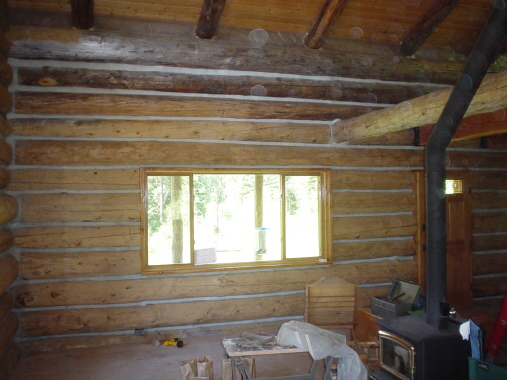
The finished wall looks very nice with a kind of organic feel to the chinking that you just don't get from a perma-chink wall. I think this is because the PC walls use precut foam chunks to back them and so they have a more standardized size. Some seams are very tiny and some are quite large but it doesn't really take that long to learn how to handle them all. Of course, this sort of hand work takes some time. Putting in the nails is the longest part of the job (and the least rewarding). It's best to have a whole bunch of folks show up and do this all at once in a party. However, a bad nailing job can really cost you extra time during the mortaring process so make sure you don't hand out the beer until every person has finished their seam. The nails should be as far into the seam as possible, they should be in an even row and they should be perpendicular. The nails can slant sideways but they should never lean outward.
I've also recently discovered that a small palm nailer with a finishing nail attachment can make the job go a lot faster. You use larger size nails (6d) everywhere and just set them in whatever distance you want.. Then come back later with a hammer and bend them up.
There were 88, 30 foot seams in my cabin or 2,640 feet of chinking. That's a half of a mile.
As I said before, sand blasting destroys mortar chinking so once you've put
this stuff in you're better to sand the logs than to blast them. You can
clean up the mortar after it has hardened by using a small brass wire
brush. This will clean off any stray swipes or globs for up to several
weeks after the mortar is in place. After that it gets too hard to do
anything with.