 It's time to start
talking about chinking. We can't really start the chinking process
until we cut out and frame all the windows. But two seams were going
to be covered by the second floor and we figured since they would be partially
hidden they might be a good place to practice and experiment. The
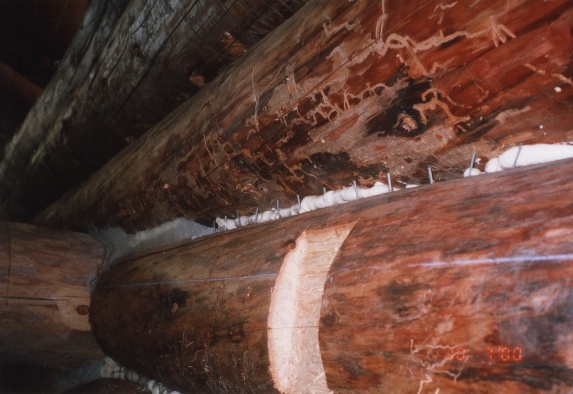
chinking method we decided on can be seen in this photo. We filled
the gap between the logs with a small bead of insulating foam. Then
we follow that with a row of galvanized finish nails. These are pounded
only into the bottom log at about 2 inch intervals. They are pounded
in at an angle and then bent up so they are straight up and down and nearly
or barely touching the upper log. Finally, mortar is spread over
the nails and pressed against the foam. You can put it in convex
or concave depending on the look you're going for and the tools you have.
It's time to start
talking about chinking. We can't really start the chinking process
until we cut out and frame all the windows. But two seams were going
to be covered by the second floor and we figured since they would be partially
hidden they might be a good place to practice and experiment. The
chinking method we decided on can be seen in this photo. We filled
the gap between the logs with a small bead of insulating foam. Then
we follow that with a row of galvanized finish nails. These are pounded
only into the bottom log at about 2 inch intervals. They are pounded
in at an angle and then bent up so they are straight up and down and nearly
or barely touching the upper log. Finally, mortar is spread over
the nails and pressed against the foam. You can put it in convex
or concave depending on the look you're going for and the tools you have.
In the foreground you can see one of the notches we cut for the metal brackets that hold up the floor beams. You can also see the blue chalk line we placed around the cabin with the laser transit. The surface of the second floor will sit 5 inches above this line. We used the level line to make sure all the brackets were at the same height and square to the floor.
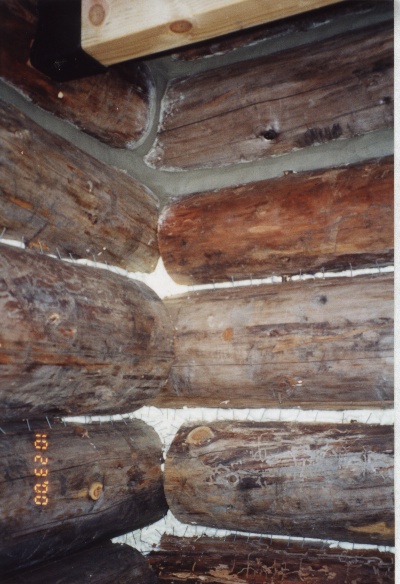 The corners get a little
more difficult with butt and pass construction because the holes can be
almost large enough to stick your fist through. Fortunately, foam
& mortar fill these gaps easily. Nailing can get a little creative
and you need to use about 4 different sizes of nails to cover all the different
widths of cracks. We found out you need to wait until the foam is
fully cured before you apply the mortar, otherwise, it can push the mortar
out as it expands when it dries.
The corners get a little
more difficult with butt and pass construction because the holes can be
almost large enough to stick your fist through. Fortunately, foam
& mortar fill these gaps easily. Nailing can get a little creative
and you need to use about 4 different sizes of nails to cover all the different
widths of cracks. We found out you need to wait until the foam is
fully cured before you apply the mortar, otherwise, it can push the mortar
out as it expands when it dries.
There are many issues with the mortar involving appearance, insulating properties, expense, structural strength and speed of application. The method we use here is very cheap (about $250 for the whole cabin), looks good for a long time and is about as time consumming as you can get. The foam gives it a fair to middling insulation level. The mortar is very strong in compression and adds structure to the log walls, especially between windows and doors. It takes a while to get the hang of spreading in the mortar but it's a pretty satisfying activity. If you're going to use mortar, you need some sort of filler between the logs to press the mortar against. If you don't, you'll just end up pushing your mortar through the crack. Almost anything will do. Foam is easy to over-apply. So be careful. Pink fiberglass stuffed between the logs works. Even boiled newspaper fits the bill, although it would tend to trap moisture inside the seam.
The other most common method is some form of latex chinking, like Perma-Chink. This tends to look good for a few years but many types split and peel eventually. It has a good insulation quality, especially if appled over solid foam strips. If you apply it yourself it isn't too expensive but most people hire professionals which raises the costs considerably. Perma-Chink conducts classes for do it yourself types.